If you’re tired of living in a sea of clutter and yearn for a more organized and stress-free life, you’re in the right place. As the Owner of So Organized and certified in the KonMari Method, I’m here to share a step by step guide showing you how to organize your wardrobe, once and for all. The basic principles I lay out in this article can be applied to the other categories in your home. We start with clothing because it’s something you use daily, so you’ll reap the benefits of getting this category organized every single morning when you get dressed. Your mornings will instantly become less stressful and more fun. This will help you stay motivated to continue on your tidying journey.
STEP 1: Imagine your ideal lifestyle.
Above all the KonMari Method is about choosing joy and living the life you want to live. So before you start physically organizing, you need to pinpoint your why and visualize the end goal you’re working towards – your ideal lifestyle.
Think about what kind of house you want to live in and how you want to live in it. Ask yourself questions like:
- What does your home look like?
- What colors do you see?
- What do you smell?
- What are you doing in your home?
- What does your perfect morning look like?
- What are you wearing?
- Who is with you?
Get really specific with this. And put it on paper. You can sketch it, create a vision board, or write it down in a notebook. Create a clear picture of what your ideal lifestyle looks like. Your ideal lifestyle will be your touchpoint throughout the decluttering process. Anytime you get stuck or overwhelmed, come back to your why. The end goal you’re working towards.

STEP 2: Set yourself up for success.
DO:
- Set aside time in your schedule. Block off 4+ hours ahead of time and treat it as an appointment you can’t cancel. I even encourage you to block off times for weeks in advance so you continue on your decluttering journey once you start. Build on the momentum.
- Remove all distractions so you can stay focused. Get childcare, put on calming music or no music at all, turn off your TV, put your phone on do not disturb.
- Have water, snacks, and plenty of sturdy trash bags on hand. Start setting aside cardboard boxes you can use for donations.
- Plan what you’ll do with the items you’re letting go of. Will you donate them? Sell them? A combination of both? Planning this ahead of time helps you avoid getting caught up with extra decision making during the editing process.
DON’T:
- Don’t purchase organizing items before you edit. Until you see what you’re keeping you have no idea what or how things will be stored. Many times you don’t end up needing a ton of extra storage solutions! I repeat, organizing products will not make you organized. You have to do the work first.
- Don’t quit before you start. Yes it can feel overwhelming, especially when you start the editing process. But this is when you come back to your why, your ideal lifestyle.
- Don’t pack your schedule the same day you’re decluttering. Decision fatigue is real people. You will feel tired after your tidying session, so give yourself a break. Celebrate all you accomplished that day with a relaxing night in.
STEP 3: Create a pile.
Set yourself up in a guest room or space that has plenty of room and gather all your clothing in one pile. And I mean everything. Get any bins of clothing stored in your attic and basement. Gather up your off season clothing including coats, hats, gloves, etc. Even your socks and underwear go in this pile!
We gather everything up in one pile because you need to see the amount of clothing you own. It’s a reality check and it may shock you, but that’s the point. You also need to have everything together to conduct a real edit. If you don’t have all your items in one spot, how will you fully know everything you have?
Tip: Make sure all your laundry is done so you truly have everything in this pile (aside from what you’re wearing of course).
Then take a moment to take in the pile in front of you. How do you feel looking at this pile? Are you surprised at how much you have?
Next, I like to ask my clients to pick out their favorite outfit from the pile. Hang it up and have it on display. This outfit should make you feel your ABSOLUTE best. This is what all your clothing should live up to. If something in your closet doesn’t make you feel your best, why keep it?
STEP 4: Edit, edit, edit!
Next up, THE EDIT! Start working through the pile item by item. Hold each item in your hands and ask yourself questions like:
- How long have I owned this?
- When did I purchase it?
- How often do I wear it?
- How do I feel when I wear it?
- When did I last wear this?
- Am I excited about wearing this in the future?
- Would I buy it again today?
- If it gets ruined (a stain, a tear, etc.), would I spend my time, money and energy to get it fixed?
We’ve all heard of Marie Kondo’s spark joy rule, and I’m going to encourage you to try it out. To do it, you need to pick up every single item individually. The power of touching your pieces provides a strong indication of your feelings toward them. When you hold that top, those shoes, or that necklace, does your body feel happiness and excitement? If so, that is the feeling of sparked joy.
Take breaks as needed, but try to power through as much as you can in one session. Always remember to come back to your ideal lifestyle when you get caught up. If you really aren’t sure about an item, set it in a maybe pile to try on at the end. And be ruthless! Will I actually wear this item? Shouldn’t I only have HECK YESes in my closet? Let go of those maybe’s.

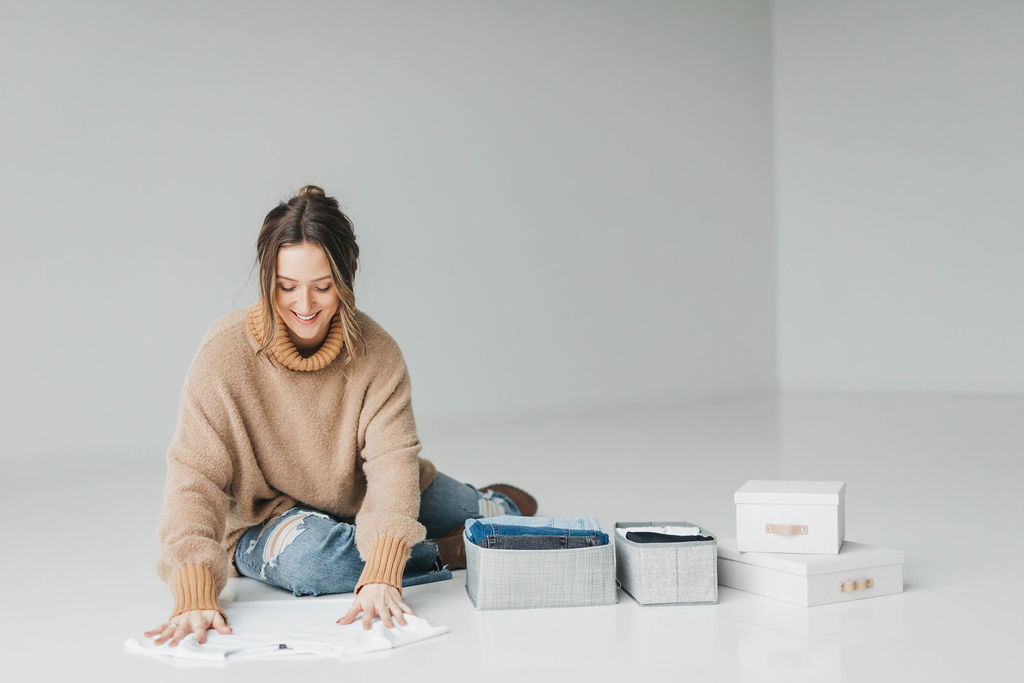
STEP 5: Organize what you keep.
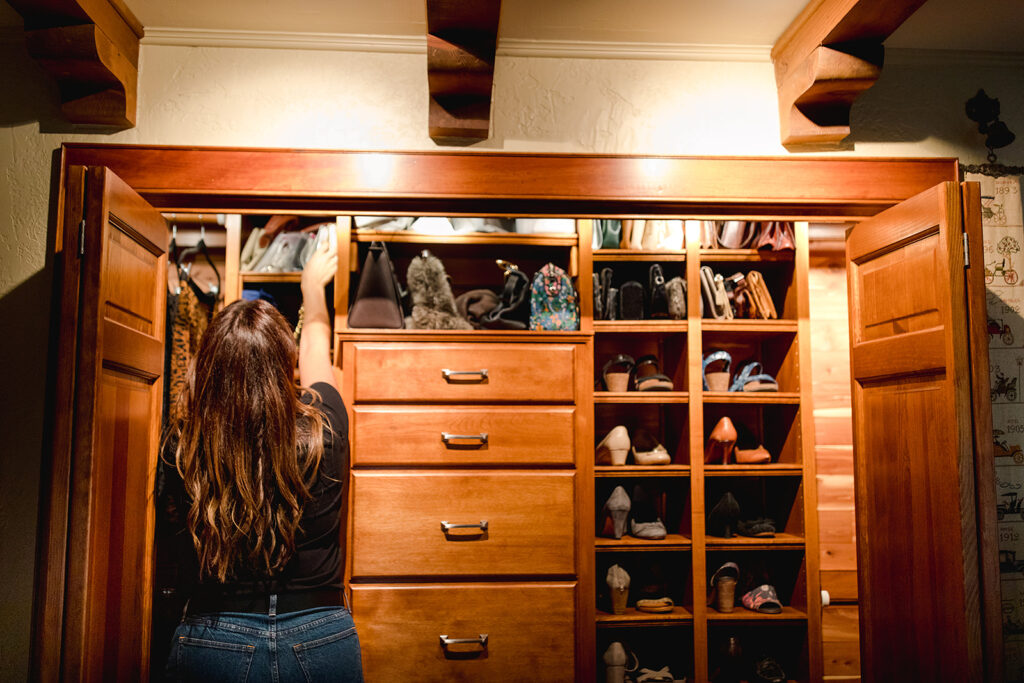
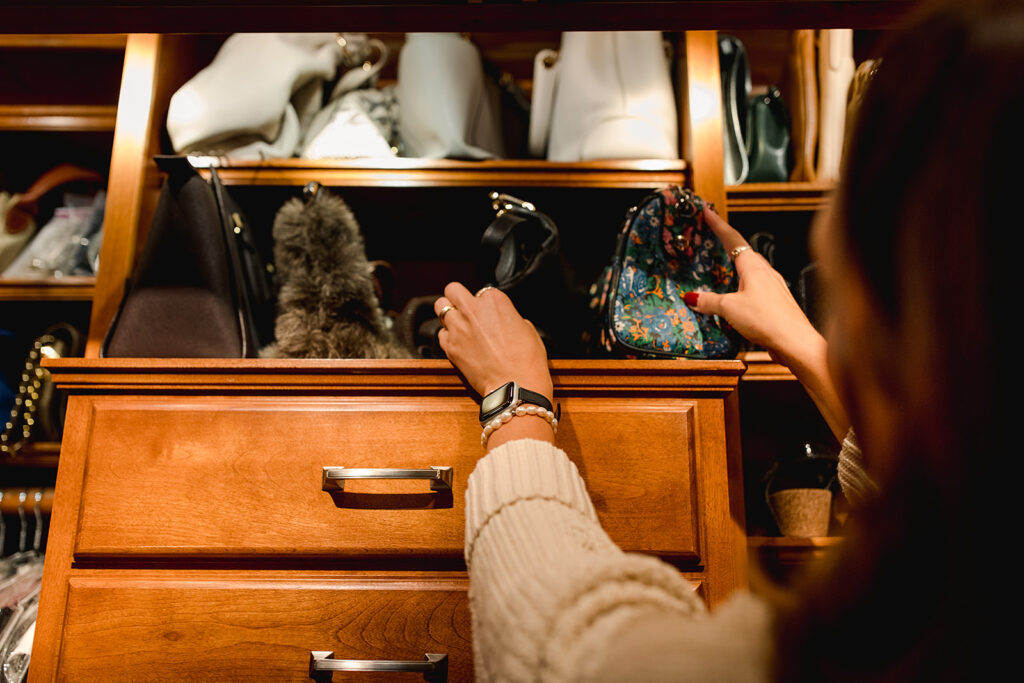
Now that you’ve edited your wardrobe, it’s time to organize what you’ve chosen to keep. Space planning and organizing is different for everyone and is based on the layout of your closet and the items in your wardrobe. You have to create a system that works for you and your space, but here are some of my top tips to get you started on the right track:
- Sort your keep pile into smaller categories. Put all the leggings together, dresses together, socks together, etc.
- Assess your closet’s hanging space, shelf space, and drawer space and plan out where each category will go.
- Categories should always be stored together.
- Don’t micro organize categories or it will be hard to maintain. I like to keep long sleeves together, but don’t separate out button ups from jackets from regular long sleeve shirts. I don’t organize dresses based on occasion, simply by color. But all my dresses are hung in one spot so I know exactly where they all are.
- Don’t cram items into a space, they should have breathing room. Just because you have space doesn’t mean you have to fill it. You should be able to move your hangers side to side!
- Color code within your categories. It looks pretty and helps you locate items faster.
- File fold – anything that is going in a bin or a drawer should be file folded. Nothing should be stacked on top of eachother.
- When possible, store light, easy to grab items on higher shelves and heavier items in a more accessible spot.
- If you don’t have the space to store all your items in one closet, set out of season items aside to be stored in airtight, labeled containers. Add a reminder on your phone of when to pull them out so you don’t forget about them! Go as far as to add a description of where that bin is stored so you truly never lose track of any of your clothing again.
The number one goal when organizing your closet is to see everything you have in one quick glance. If you can’t see it you will forget you have it and won’t wear it. And of course have fun! Put your favorite shoes or purse on display, add artwork, paint your closet your favorite color or add a fun wallpaper. Your wardrobe shows off your identity, why not make your closet an extension of that? You should feel joy when you open your closet!
STEP 6: Enjoy your new found peace!
You’ve put the work in, now enjoy your organized closet! But don’t stop there.
Once you’ve completed the clothing category, move on to the next category: books. Apply these same principles as your work through your books. After books, move on to paper, then komono (miscellaneous – aka every other category of items in your home), and finally sentimental items.
Seek Help if Needed
If the task of decluttering feels overwhelming don’t hesitate to seek professional help. A professional organizer can provide valuable insights, personalized strategies, and the motivation needed to tackle even the most challenging organizing projects. Think of me as your accountability partner.
Make the commitment to declutter your life and create a more organized living space. By setting clear goals, putting in the work, and adopting daily habits you can transform your home into a place of peace and tranquility. Remember, getting organized is a journey, not a destination – take it one step at a time. Cheers to a well-organized and fulfilling 2024!

Lisbet Byler is the Founder and Lead Organizer at So Organized. Based in Lancaster but working with clients all over the country, Byler is a professional organizer certified in the KonMari Method™, and is dedicated to helping everyone from young professionals, to busy parents, to empty nesters learn to let go of clutter and welcome in a more peaceful and fulfilling life. Whether you’re looking for a total overhaul or just need help in one area, she will guide you through your organizing journey — teaching you practical tools to maintain your space and live a clutter-free life.
Where To Start: Decluttering


